Caramel Sandwiches (1915) ★★★★★

Perhaps its my Dutch roots showing, but I'd prefer a deliciously sweet sandwich like this over a savory one any day!

Original Recipe:
1 tablespoon of butter
1 cup of light brown sugar
1 tablespoon of water
Melt the butter with the light brown sugar, and the water; cook for a few moments, till well incorporated, then spread between slices of buttered bread.

The Verdict:
This tastes exactly like sucre a la creme! And for those who aren't familiar with this Canadian treat, sucre a la creme is a traditional fudge from Quebec which is made with, well...pretty much the exact same ingredients as this sandwich filling. It was a delicious and decadent spread which seemed perfect for tea time sandwiches. I used whole wheat bread because it's just what we eat, but I think white bread would make this prettier and would really let the caramel flavour shine a little more. The caramel itself was a bit grainy, but that's probably just my impatience. It didn't bother me at all, but if you want a smoother spread, make sure the sugar completely dissolves (234 - 240F) and stir constantly as it cools so that large sugar crystals won't form.

Modernized Recipe:
(Adapted from The Suffrage Cook Book)

1 tablespoon BUTTER, unsalted
1 tablespoon WATER
1 cup BROWN SUGAR
BREAD

1. In a small saucepan, heat the butter, water, and sugar until the sugar is completely dissolved (234 - 240F). Once the sugar has dissolved, heat to boiling. Remove from heat and stir briskly until thickened and cooled.
2. Butter slices of bread and sandwich the cooled caramel between two slices. The caramel will solidify quickly, so only do one sandwich at a time and make sure the caramel is still warm enough to spread. Remove crusts and cut into fancy shapes if desired.


1 comments:

Cherry Fritters (c. 1923) ★★★★★

As a Canadian, I love donuts, especially those from Tim Hortons (what can I say? I'm a traditionalist). Fritters are one of my favorites (although I prefer the crusty glaze to powdered sugar), but I've never had a cherry fritter before!
Also, for some reason this cookbook wasn't dated. I did a brief Google search and found it listed with both 1923 and 1928 as a date, so I just went with the earlier.

Original Recipe:
Something different in the way of dessert can be had by making cherry fritters according to the accompanying recipe.

Sufficient to serve six.
1 cup flour
2 teaspoons baking powder
1/4 teaspoon salt
2 tablespoons sugar
1/2 cup milk
1 egg
2 tablespoons butter
1/2 cup cherries cut into halves

Mix and sift the dry ingredients, add the milk and egg, and beat all together well. Add the melted butter and fold in the cherries. Drop by spoonfuls into hot fat and fry until brown. Remove from the fat, sprinkle with powdered sugar, and serve.


The Verdict:
Forget six, this recipe fed two! Mr. Man and I just inhaled these. But I got 12 golf-ball sized fritters, so if you're portioning out two per person, I suppose the recipe would feed six. They were really tasty. I was hoping for a fluffier inside though, so perhaps I should have whipped some more air into the batter. I also used closer to 3/4 cup of cherries, and even that was a tiny bit less than I would have liked. But overall, a winner!

Modernized Recipe:
(Adapted from Woman's Institute Library of Cookery, Volume 5)

1 cup FLOUR
2 tablespoons SUGAR
2 teaspoons BAKING POWDER
1/4 teaspoon SALT
1/2 cup MILK
1 EGG
2 tablespoons UNSALTED BUTTER, melted
1/2 to 3/4 cup CHERRIES, pitted and chopped in half
OIL, for frying
POWDERED SUGAR, for dusting

1. In a medium bowl, whisk together the flour, baking powder, sugar, and salt. Meanwhile heat about an inch or two of oil in a fry pan (I originally started with just a bit of oil, which resulted in a pancake-like shape. More oil will allow for a rounder fritter).
2. Add the milk and egg and whisk until well combined.
3. Whisk in the melted butter and fold in the cherries.
4. When the oil is hot, drop in about one tablespoon of batter for each fritter (don't overcrowd the pan), using an ice cream scoop or a spoon.
5. Let the fritters cool and sift or sprinkle powdered sugar over the top.


1 comments:

Black Butter (1839) ★★★★★

I picked this recipe because I was really intrigued by the name. The recipe claims that it is healthier than salt butter....but I'm not really sure how sugary fruit is any better than salty butter...? Anyway, this is a great 2-ingredient recipe for some quick jam. I bet this would even be great used as a sauce on pancakes or ice cream or as the filling for a cake.


Original Recipe:

The Verdict:
I used cherries and I really liked this! It was sooo yummy. Little Y liked it too :)
The only thing is that I overcooked it a little too much, so it was very thick and a bit tough to spread. It didn't effect the taste at all though. Also, I added a tiny bit of water, because the cherries weren't super juicy. Other fruits like berries might not need the extra water, especially if they're from frozen.

Modernized Recipe:
(Adapted from The Good Housekeeper)

1 pound BERRIES, CURRANTS, or CHERRIES
1/2 pound SUGAR

1. Wash and pit fruit, if needed. Mix sugar and fruit in a medium saucepan. Add a small amount of water if needed, but remember the fruit will emit some juices.
2. Boil fruit until it has reduced to 1/4 the original amount and is thick enough to spread on bread.


2 comments:

A Recipe-less Post

12:52 PM 2 Comments


Firstly, I received a lovely comment this morning from Abby at things for boys. She has nominated me for the Sunshine Award, which is very kind! Apparently this award is given by bloggers to bloggers "who positively and creatively inspires others in the blogosphere." I'm a blogger of little words (maybe you noticed?) and I don't really do the whole award thing, but it was sweet nonetheless. Also, I don't really read any blogs to nominate, as embarrassing as that is to admit.

Secondly, this morning I stumbled across What's on the Menu?, a website run by the New York Public Library. This is an awesome way to get involved and to experience a hands-on approach to food history! The NYPL has a great collection of historical menus, and needs help transcribing them so that they are searchable. This will also allow them to compile data about the foods that were consumed in the past.

Thirdly, I have some great upcoming recipes to post in the upcoming week, including cherry fritters, black butter, and another macaroni and cheese recipe - with a twist! I'm interested to see how it will compare to the popularity of my first macaroni and cheese recipe.

And to my readers - thank you for reading my humble little blog! If anyone has any suggestions or dishes they would like to see, feel free to leave a comment.


2 comments:

Picnic Lunch (c. 1905) ★★★★


Summer is the perfect time for picnics, so I thought I would share this bill of fare for a picnic lunch from a circa 1905 California cookbook. I also decided to include some lemonade with our picnic. It isn't listed in this menu, but it was included in another picnic menu from the same cookbook. Also, I didn't make the salad dressing because I just used mayonnaise.
Overall, it seems like picnic food hasn't changed much over the years!


Original Recipes: 
The Verdict:
Veal Loaf: It was good, but I overdid the celery salt just a bit. It's very strong stuff, so you only need a pinch. Other than that it was yummy.

Cheese Sandwiches: Well...it's just mustard and cheese in bread, so....yeah, it was good.

Olive Sandwiches: Mr. Man really liked these, but our olives had apparently gone off, so he threw it out. He said otherwise the sandwich would have been delicious.

Potato Salad: Mr. Man LOVED this. But he loves anything with cayenne, so I wasn't surprised. He practically licked the bowl clean.

Wafers: At first I thought these were super weird and didn't really like them, but the more I ate the better they tasted. They cooked up with domes in the centers and were really spongy like mini pancakes. I am assuming you are supposed to eat these with jam, since the menu says to bring along some jelly. They taste very buttery and are alright on their own, but really delicious with jam.

Overall, a lovely picnic and all the recipes were edible!


Modernized Recipes:
(Adapted from The Times Cook Book, No. 2 )

Veal Loaf
1 1/2 pounds GROUND VEAL or BEEF
1/4 pound BUTTER, softened
1/4 cup CRACKERS, crushed, or BREAD CRUMBS
1/4 cup MILK
1 EGG
SALT
PEPPER
SAGE
THYME
CELERY SALT
BUTTER

1. Preheat oven to 350F. Line a cookie sheet with parchment paper.
2. In a medium bowl, thoroughly mix together ground veal (or beef; I used ground beef), butter, crackers/bread crumbs, milk, egg, and spices to taste.
3. Form the meat mixture into a loaf shape and place in the middle of the lined cookie sheet.
4. Bake the loaf for about 1 hour, basting occasionally with some butter which has been melted with a little water.

Cheese Sandwiches
BREAD
BUTTER, softened
SWISS CHEESE
MUSTARD

1. Butter slices of bread. Fill sandwiches with cheese and mustard.


Olive Sandwiches
BREAD
LETTUCE
OLIVES
MAYONNAISE or SALAD DRESSING

1. Dice olives and mix them with enough mayonnaise to spread on the number of sandwiches you want. I think I used about 5 olives and 1 tablespoon of mayonnaise for 1 sandwich.
2. Spread the mixture on crisp lettuce leaves and place between two slices of bread.

Potato Salad
12 medium POTATOES
3 tablespoons PARSLEY, minced
3 tablespoons CELERY, minced
2 tablespoons ONION, minced
SALT
CAYENNE PEPPER
3 HARD BOILED EGGS, diced
1/2 pint MAYONNAISE or SALAD DRESSING

1. Peel and dice 12 medium potatoes. Boil until tender.
2. In a medium bowl, mix together the remaining ingredients.

Salad Dressing
2 EGG YOLKS
1 tablespoon BUTTER, softened
4 tablespoons VINEGAR
1 teaspoon SALT
1 teaspoon SUGAR
1 teaspoon MUSTARD
1/2 cup CREAM

1. In a small bowl, beat together the egg yolks and the butter. Mix in the vinegar, salt, sugar, and mustard. 
2. Put boiling water in a larger bowl or pot and float the smaller bowl with the dressing in the boiling water. Whisk until it thickens.
3. When the dressing has thickened, take it off the heat and let it cool. Mix in the cream.

Wafers
1 cup UNSALTED BUTTER, softened
1 cup SUGAR
2/3 cup BUTTERMILK
1 teaspoon BAKING SODA
2 EGGS
1/2 teaspoon SALT
FLOUR
JAM, optional

1. Preheat the oven to 400F.
2. In a medium bowl, beat together the butter and sugar until combined. Mix in the buttermilk, baking soda, eggs, and salt.
3. Add enough flour to make a soft dough. I think I used 2 cups, or maybe less.
4. Drop teaspoonfuls of batter on a cookie sheet lined with parchment paper and bake for 7 - 10 minutes, or until firm and golden around the edges. Serve with jam if desired.


2 comments:

Watermelon Ice (1919) ★★★★

This is one of the few watermelon recipes I could find that was NOT for pickling the rind. Apparently that was a popular thing back in the day, because I've never seen a recipe for pickled watermelon rind in a modern cookbook.

Original Recipe:
Cut a watermelon in halves, scoop out the entire center, taking out the seeds; chop in tray; add a cup of sugar. Pack the freezer, turn a few minutes. It will be like soft snow and delicious.


The Verdict:
This was alright. Not amazing, but not bad either. I just diced my watermelon, but I think pureeing it in a food processor would have really improved the "soft snow" texture. I bet you could even do this in an ice cream maker for a nice soft-serve consistency.

Modernized Recipe:
(Adapted from Vaughan's Vegetable Cook Book)

1/2 WATERMELON, chopped
1 cup SUGAR

1. Roughly chop the watermelon. Remove the seeds. Save the rind if you want to make a nice presentation.
2. In a food processor, puree the watermelon and the sugar.
3. Use an ice cream maker or freeze in a 9x13 pan, scraping every 30 minutes or so with a fork until all the liquid is frozen.


2 comments:

Baked Rhubarb and Bananas (1917) ★★

Okay, this is the last rhubarb recipe - I promise! I actually made this for Little Y. Many babies apparently enjoy the sourness of rhubarb, and it is one of the least allergenic foods, so it is appropriate for an infant. It also cooks down to a nice, mushy texture without pureeing. Even though Little Y is nearly two, I substituted coconut oil for the butter because we've had some setbacks with solids and haven't tested dairy with her yet. Also, I cut the recipe in thirds to make a smaller portion.

Original Recipe:
Ingredients
2 cups rhubarb
3 bananas
3/4 cup sugar
1 tablespoon butter
Instructions 
Wash rhubarb and cut, unpeeled, into one-inch pieces; peel and slice bananas, and arrange in a baking dish in alternate layers with the rhubarb; add sugar and butter, cover, and bake in a slow oven two hours. Serve hot or cold.

The Verdict:

Little Y was enthralled at first, but quickly discovered that rhubarb is sour! In the end, she wasn't a fan and just picked out all the bananas. But she is often picky at first, so I'll try again. I tasted it myself and I really didn't enjoy the flavour combination, but apparently some people do, so if you like the combination of bananas and rhubarb, this would probably be delicious.
(edit: I added some sugar and mushed the bananas into the rhubarb and she gobbled it up. Guess she just wasn't a fan of the tartness of rhubarb.)

Modernized Recipe:
(Adapted from Better Meals for Less Money)

The original recipe is easy to follow. The only change I would make is to stir the sugar into the chopped rhubarb before layering. The banana is sweet enough on its own, but the rhubarb really needs to be coated in sugar.


0 comments:

Rhubarb Shortcake (1920) ★★★★★

Here's another rhubarb recipe, this time a take on the classic strawberry shortcake!

Original Recipe:
Ingredients
2 cups of flour
1 teaspoon of salt
4 teaspoons of baking powder
1/2 cup of sugar
6 tablespoons of shortening
2/3 cup of milk
Instructions
Place flour in a bowl and add salt, baking powder, and sugar. Sift to mix and then rub in shortening. Mix to a dough with milk. Cut with a large cookie cutter and then bake in a hot oven for fifteen minutes. Split and butter, and then fill with the cooked rhubarb and serve with either plain or whipped cream or custard sauce.


The Verdict:
Mr. Man REALLY loved the cakes - even by themselves. I think he ate like five of them while I was busy taking photos. With the rhubarb is really nice, but overdoing the whipped cream could easily make it too rich. Also, my cakes were not tall or fluffy enough. I think it might be because I substituted butter for shortening? This was my first time making shortcakes actually, so I was just pleased that they were edible. Regardless of presentation, these were yummy and I would definitely make and eat them again!

Modernized Recipe:
(Adapted from Mrs. Wilson's Cook Book)

The original recipe is easy enough to follow. To make the cooked rhubarb, just simmer some chopped rhubarb with a small amount of water and sugar to taste.


3 comments:

Rhubarb Toast (c.1886) ★★★★

One of the reasons I love spring is because rhubarb is in season (let's ignore that the first day of summer is in a week)! 

Original Recipe:


The Verdict:
The original recipe seemed like it was meant to feed a small army or something, so I quartered it. I still ended up with over a cup of sauce. The sauce is very tart, so if you like your rhubarb on the sweeter side, I suggest adding more sugar to taste. I didn't mind it, but it was rich so I barely made it through the two slices. It was good though; basically like a rhubarb jam. I actually poured some over a slice of cake and I enjoyed it a lot that way. So yay! Multipurpose sauce!

Modernized Recipe:
(Adapted from The Woman Suffrage Cook Book)

1/2 cup WATER
1/8 cup SUGAR
1/2 pound RHUBARB, diced
WHOLE WHEAT BREAD or GRAHAM BREAD

1. In a small saucepan, heat the water and sugar to boiling. Add the rhubarb and cook until the rhubarb is soft and falls apart, about 5 minutes or so. Let cool.
2. Toast bread and butter it. Serve with cooled rhubarb poured over it.


0 comments:

Easy Orange Cake (1957) ★★★★★

I loved the retro illustrations in this kids's cookbook! You can easily make this recipe by following the original instructions, but I found them a bit small to read, so I've typed them out below.

Original Recipe:


The Verdict:
If you like boxed mix cakes (I'll admit here that I do) this is a nice way to dress one up. The cake is not overly transformed by the recipe, so it's the sauce that really makes this. It's deliciously citrusy with just the right amount of tang. If you use fresh juice from an orange and a lemon it will really boost the flavour.


Modernized Recipe:
(Adapted from Betty Crocker's Cook Book for Boys and Girls)

Orange Cake
1 box YELLOW CAKE MIX (and required ingredients, usually EGGS, OIL, and WATER)
2 tablespoons ORANGE ZEST, grated

Clear Orange Sauce
1 cup SUGAR
1/4 teaspoon SALT
2 tablespoons CORNSTARCH
1 cup ORANGE JUICE
1/4 cup LEMON JUICE
3/4 cup BOILING WATER
1 tablespoon UNSALTED BUTTER
1 teaspoon ORANGE ZEST, grated
1 teaspoon LEMON ZEST, grated

1. Grease and flour a 9x13 pan. Make the boxed cake mix according to directions and fold in the orange zest before baking. You may also use a homemade yellow cake recipe and simply fold in the orange zest.
2. While the cake is baking, make the sauce.  In a saucepan, mix the sugar, salt, and cornstarch. Stir in the orange juice, lemon juice, and water and bring to a boil for 1 minute, stirring constantly. Remove from heat and stir in the butter and zest.
3. Serve the cake warm with the warm sauce over top.


0 comments:

Glazed Carrots with Peas (1911) ★★

(Can you tell I'm trying to use up the mint I bought?! As the Japanese say, mottainai!)

It always interests me when a recipe calls for an ingredient that must have been well known at the time, but is no longer common today. In this case, I wondered what a can of "French peas" was exactly. Was the recipe calling for the infamous mushy peas? Or were they simply whole, canned peas? Was it a canned recipe for French-style peas? A post on Restaurant-ing Through History enlightened me: apparently in the mid- to late- 19th century, peas imported from France were all the rage. They were so popular among the upper classes that "French peas" on a menu was a distinguisher of class, privilege, and delicacy. Mrs. Beeton wrote in her 1861 The Book of Household Management, "in the reign of Queen Elizabeth, Fuller tells us they were brought from Holland, and were accounted "fit dainties for ladies, they came so far and cost so dear." An 1896 cookbook from Boston remarks that peas "appear in market as early as April, coming from Florida and California, and although high in price are hardly worth buying, they having been picked so long." So while the following recipe might seem like a simple side dish of veggies, the social history behind it is quite a bit more detailed.

I actually had never heard of peas with mint before I had my daughter - at which point peas and mint baby food appeared. However, the combination of mint and peas was nothing new to Mrs. Beeton, who wrote that mint "is valuable as a stomachic and antispasmodic; on which account it is generally served at table with pea-soup". An earlier 1840 cookbook gives directions for cooking peas with mint and states that this is a very English method. 

Original Recipe:


The Verdict: 
Unfortunately I have to say that I rinsed these peas off in an attempt to salvage them for dinner, but even then couldn't bring myself to eat them. Amazingly, Little Y just gobbled them up (after rinsing), so...I guess this recipe wasn't a total flop? But 1/2 a cup of butter is just SO MUCH BUTTER. I even used the carrot butter for the peas and there was a ridiculous amount left. Also, there is a lot of sugar there for just 3 carrots. I wasn't a huge fan of the mint with the carrots, but the peas were alright. I would eat this if I had to, but I would never make it again. If you like sweet carrots (I don't) and mint on your veggies, you would probably enjoy this, but perhaps with a bit less sugar and like, 1/4 cup max of butter. Points for prettiness though!

Modernized Recipe:
(Adapted from Good Things to Eat)

3 medium CARROTS
1/2 cup BUTTER
1/3 cup SUGAR
1 tablespoon FRESH MINT, chopped
1 can SMALL PEAS (or use desired amount of fresh or frozen)
BUTTER, for seasoning
SALT, to taste
PEPPER, to taste

1. Wash and peel the carrots. Cut them into cubes or use a small cookie cutter to make "fancy shapes".
2. In a saucepan, melt the butter with the sugar and mint. Add the carrots and cook on low heat until glazed and tender.
3. If using canned peas, drain and rinse them. Boil water in a saucepan and cook the peas for five minutes. When done, drain and season with butter, salt, and pepper.
4. Mound the peas on a serving dish and surround them with carrots. Serve hot.


0 comments:

Iced Tea with Mint (1904) ★★★★★

Here's another simple Edwardian Era recipe. For those who are interested, Vintage Recipes has a great page about tea time etiquette. 
It's been gloomy and rainy the past few days, so unfortunately I haven't been able to take any great photos. I've got a bunch of more interesting recipes I'm dying to make!
By the way - on Saturday I broke 60k total page views! Woo!

Original Recipe:

The Verdict:
I'm not a tea drinker, so I let Mr. Man taste test this. He really liked it, but said it definitely needed a little sugar.

Modernized Recipe:
(Adapted from Food and Cookery for the Sick and Convalescent)

TEA
ICE
1 slice LEMON
2-3 leaves FRESH MINT, bruised

1. Put the mint in the bottom of a teacup and bruise it by gentle rubbing it with the back of a spoon. In the same cup, make your tea, but use only half the usual amount of water. Crush the ice in a blender.
2. If you don't mind the ice mostly melted, you can mix it right in to the tea. If you want more of a granita or slushie style drink, let the tea cool before pouring it over the crushed ice.
3. Serve with lemon and sugar.


0 comments:

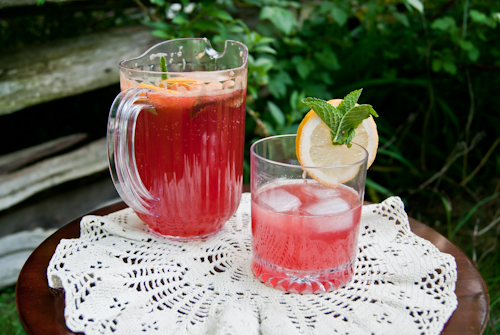
Mint Punch (1934) ★★★★★

As a child I loved to mix things. I especially loved to mix juices. I would happily drink my grape-orange-fruit punch-apple juice, even when other people were disgusted at its swampy brown-green coloring. So naturally, I love to make punch recipes! 
I loved that the owner of this cook book made their own interpretation of this recipe, so I decided to follow that instead of what was published. I think overall, it just halves the recipe, but whatever. 

Original Recipe: 


The Verdict:

OH MY GOODNESS THIS IS SO DELICIOUS. Also, I made this with only 1 orange, but it was still awesome. I figured that old-timey oranges were probably less monstrous than the ones we have today anyway. If you crush the mint right, there should be a faint, but present and not overpowering minty-ness. Then you taste the citrus, which is just tart enough because of the sugar syrup. And the carbonation from the ginger ale is a nice touch. This is perfect for a summer party. Even Mr. Man, who freaked out at first because he has something against grape juice thought this was different and delicious.

Modernized Recipe:

(Adapted from New Tested Recipes)

3/4 cups SUGAR
1 cup WATER
1 LEMON
2 ORANGES
1 cup GRAPE JUICE
2 sprigs MINT, crushed*
1 LEMON, sliced
2 cups GINGER ALE
ICE

1. In a saucepan, boil the sugar and water for 2 minutes. Let cool.
2. While syrup is cooling, juice the lemon and oranges.
3. In a pitcher, mix the citrus juices, grape juice, crushed mint, and ginger ale. Stir in the cooled syrup and sliced lemon. Add the ice to the pitcher or to punch glasses.

* The best way to crush mint is to muddle it with a special muddling device. If you don't have one, use a mortar and pestle or the back of a spoon. You want it to be just bruised enough to release the juices, but not completely pulverized or it will become bitter.


4 comments: